Help a computer guy if a solution has helped you.

Tuesday, April 29, 2008

Drive is not accessible. Incorrect function when trying to open CD in Windows XP

Strange error this one ,when a customer tried to open a CD by clicking on it in My computer he would get the error D:\Is not accessible. Incorrect function.
After doing some research at Microsoft and other areas the only real solution that worked for me was to Right-click the CD drive and go to properties ,then recording tab ,finally enabling the option to allow recording on this device.
And that was it the error went away when opening a CD.


Monday, April 28, 2008

Add a new hard drive to your desktop computer

Time to add a new hard drive to the computer ,it can be bigger or the same size.
In this case I am going to add a bigger drive as a secondary drive so I can save all of my favorite stuff onto it, it will also be an older IDE form drive.
First step is to open the computer box, depending on your box you might have to remove both side panels or just one panel.
Find a spare drive bay to install the new drive to ,usually below where the current hard drive is.
Make sure the data cable that is already connected to your main hard drive has a spare connector and long enough so you can attach your new drive to it.
There must also be a spare power connector coming from the power supply to connect to the drive.
We now have to change the drives jumpers ,that is make it slave on the cable ,since the main drive should be on the master setting, look on the diagram on the top or bottom of your new hard drive to set it as slave.
Once you have made the adjustments and the cables reach you can now install the drive.
Remove the drive from its packaging and slide it into the spare drive bay from inside the computer box ,line it up with the two screw holes on the drive bay(if the drive is too long then only line it up with one hole).
Screw in the two screws on the side facing you then turn the computer box around and screw in two more screws on the other side ,this will make sure the hard drive is secure.
You should now plug in both cables make sure they are connected the same way as the old drive ,the data cable should have a faint vertical stripe on it this stripe must point towards the power connector of your drive ,the power connector only goes in one way.
Once everything is connected switch on the computer ,enter bios by pressing the DEL key or similar (when the computer first posts or makes a beep it should say press the following key.. to enter setup.)
Once in look for the option Standard Cmos Settings or IDE devices to make sure the system sees both your old drive and your new one if it does go to the Exit section and save and exit.
If your drive is not shown then you must check the jumpers and cables.
when booting into windows the drive should automatically be installed, restart the computer when prompted.
When back in windows(2000 or XP) you can see if the drive is ready for use by going to My Computer and look for a new drive letter ,if you don't see one then you will have to partition and format the drive in order to make it workable.
To do this you will need to use the built in Disk Management feature.

That's it a new drive has been installed and ready to be used.


Thursday, April 24, 2008

Windows XP does not autoplay CD's

This one can be annoying since the CD does not autoplay and you have to go to my computer and click on the CD ROM icon to play the CD.
the best solution that worked for me from Microsoft was the one about editing the registry, locating the following key :HKEY_LOCAL_MACHINE\System\CurrentControlSet\Services\CDRom and changing the value of Autorun to 1.
After changing it I reboot the computer pop in any CD and it now autoplays.
Great.


computer does not switch on ,burning smell

The other day I try to switch on a computer to do a format but it didn´t switch on instead I smelt a burning smell coming from the back of the computer.
I quickly removed the power lead from the power supply to avoid damaging the computer even more ,I opened up the box ,reconnected the power lead and pressed the power switch and waited to see what was causing it.
Suddenly smoke came out of the power supply ,at the moment it seemed to be the culprit ,to make sure it wasn´t another component that was doing this I disconnected the power leads from the power supply to the other devices such as hard drive ,CD roms and floppy drive ,only the lead to the motherboard was connected I then reconnected the power lead from the mains to the power supply and pressed the power switch on the front of the computer again ,the same result happend smoke and burning smell.
knowing that the power supply had to be the culprit I removed it and connected a used power supply I had lying around .
The computer switched on ,beeped and booted into windows, all was fine.
It was lucky that only the power supply had died since it could have been a more expensive problem such as the system board or processor.


ball mouse not moving correctly anymore

If you have one of those old mice with a ball at the bottom instead of the newer optical ones(the ones with the red light at the bottom), you may notice the pointer doesn´t move so well anymore when you move it.
One big way to fix this is to turn the mouse upside down and remove the protection lock that holds the ball in place by turning it anti-clockwise.
Remove the ball and clean the three small scrolling wheels that are inside with a cotonete and some alcohol(not the drinking kind ) untill the excess dirt is gone.
Put back the ball and close the lid ,it should work now like new.


Wednesday, April 23, 2008

view windows and office product key

Sometimes when you can´t find your product key or somehow you have lost it there is a quick way to view what your key is by using a very simple program.
Produkey enables you to view the windows key from 2000 and up, it can also show Microsoft Office XP and 2003 keys.
so you dont have to buy another key if you can´t find yours.

Rememebr if you have formatted your hard drive then this wont work , you will have to buy another key.


computer slows down when connecting Ipod or other external USB mass storage device

A customer had a problem with his Ipod, when connecting it the computer would slowdown, the hard drive would start making strange noises and itunes would not recognise the device.
So the first step was to remove and reinstall itunes and the Ipod but with no success as the problem persisted.
I then decided to change the hard drive for a new one since it was making strange noises I thought this was the problem but again the problem persisted I then decided to format and reinstall windows onto the new drive ,keeping his old system on the old drive in case the format didn´t work I had a backup.
I did the format and reinstalled windows the Ipod and itunes, it started to work fine, managed to detect the device and copy music from the computer to the Ipod when all of the sudden the computer went slow ,hard drive made clunky bad sounds and the copy process did not complete with an error.
Frustrated i decided to change hardware parts I changed the easiest one the power supply and behold all worked fine.
no more slowness ,clunky noises and managed to copy over 200 songs to the Ipod with no errors even put back the old drive with his system and it also worked.

Its just a reminder that there is always a way to fix these problems it just takes time.


Tuesday, April 22, 2008

How to format windows xp

when a computer becomes too slow, corrupt and full of programs sometimes its best to format and reinstall windows.
Before formatting make sure all important information has been backed up and you have the necessary installation disks eg: windows CD ,office programs ,burning software etc.
Depending on your type and brand of PC you might have a CD that does everything for you like an HP, Dell, Acer or other PC.

To start formatting reboot the PC and on the first screen the computer shows(it can be the one where you here the beep) there is a key sequence that you have to press to change the boot order or enter setup, press the change boot sequence key and you will get a list of devices to boot from, here you select your CD or DVD drive.

If you only get the enter setup option access it and look for a boot order option and change your first boot device to CD or DVD drive ,save the changes and exit.
The computer should now boot from your CD you will get a prompt saying "press any key to boot from CD" you must press any key now, (for an HP or other branded PC that has a recovery disk when you boot from the CD follow the instructions provided.)

windows will now load the setup program, when it is ready it will give you three options at the screen with the blue backround.
Choose the option To setup windows XP now, press Enter


At the Windows XP Licensing Agreement page press F8 to continue.


At the next screen you must choose which windows installation to install a fresh copy over.
If you have a single installation of Windows on your PC it should already be highlighted. If you have multiple installations, select the installation that you are wanting to reinstall.
Press the ESC key to choose the option to install a fresh copy of windows XP.

On the next screen press D to delete the selected partition ,you will get a warning screen here you press enter to continue the deletion ,another screen will appear with a last warning press the key L to finalise the deletion.

You will be back at the main screen, windows has been deleted and so has the partition.

Choose the option to set up Windows XP on the selected partition by pressing Enter.

Next choose how to format the partition I recommend the option Format the partition using the NTFS file system as its the recommended file system for XP and it also checks your hard drive for bad sectors and corrects them, Press Enter to continue.

Depending on the size of your partition or hard drive formatting can take anywhere for 15 to 1hour to complete so be patient and go take a break while it does it.

when the formatting is complete setup will copy the necessary installation files from the Windows XP installation CD to the newly formatted partition, when that is complete setup will reboot your PC you do not have to press any key to start from a CD just let the PC reboot with the CD still in the drive.

you will now get a graphical version of setup and your mouse will be usable.


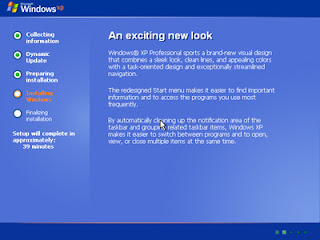
Just follow the steps ,choose typical settings when possible and you must have your windows XP product key with you as you will need to input it when asked.
when finished setup will reboot once more to the final step of the installation.
follow the steps again choose if you want to activate windows and enter you user name when prompted ,when you get to the Thank You screen click on finish and windows will load for the first time ,the installation process is now complete.
After giving yourself a a pat on the back it will be time to install the driver CD for your computer and any other Cds that came with external devices such as printers ,webcams etc.


computer has noisy fan

Today I walk into work and the computer is making a noisy sound coming from the back ,so I decide to give myself a challenge and try to resolve it.
The first step is to look at the power supply fan at the back of the box and make sure its spinning if it is then the problem may lye elsewhere if it´s not spinning then we will have to replace the whole power supply unless you´re not afraid of opening a power supply and replacing that specific fan and also risking to get a shock ,if the power supply fan is working then we will have to open the box.
I open the box side panel by removing the two screws at the back holding it.
I then remove the panel and while the computer is on I have a look inside, since I only have two fans( one on the power supply and one on the CPU) It has to be the CPU fan that's at fault and it sure is since its not spinning correctly.
To remove the CPU fan the computer must be switched off and disconnected from the mains power .The best way to do this is to lye the box flat on the its back so you can work easier also touch the chassis of the box(the metallic structure of the box) to ground yourself before touching any parts.

Now we have two options to repair the fan before we go further .
1: we replace the Heat-sink and fan
2: we add lubricant oil to the ball bearing of the fan

I recommend the first option since oiling the ball bearing can be messy and the problem could repeat itself quite soon.
To remove a Pentium 4 CPU in the socket 478 form factor ;http://www.intel.com/support/processors/pentium4/sb/CS-007989.htm
For the newer Pentium 4 CPU socket 775 ;http://www.intel.com/cd/channel/reseller/asmo-na/eng/products/desktop/processor/processors/pentium-4/tech/99345.htm
For AMD CPU you basically lift the metal clip with a flat screwdriver downwards towards the board then move it forward then up;http://www.amd.com/us-en/Processors/TechnicalResources/0,,30_182_869_4348%5E6678,00.html

After removing it you should go buy a new one and no more noise.
I was lucky to have a used one that was still noise free, you should actually buy the Fan before you remove the Fan from the board unless you need to take it to a computer shop and ask for a similar one.